Showing posts with label Cycling. Show all posts

Thursday, May 25, 2017

FTP Testing - Coggan or Friel? Is the 5% discount too much?

Dr. Justin Choo on the Dragon's ITT course, North Lantau


Functional Threshold Power (FTP) is defined as the average power that you can maintain on the bike for a one-hour, all out, race effort.

Knowing your FTP allows you to set zones that form the basis for your training. There are many different protocols used to test for FTP. Two of the most widely used methods are the Coggan test, and the Friel test.

Presented in his book Training and Racing with a Power Meter (widely considered to be the power training bible), the Coggan Protocol is essentially as follows:
  1. 20 minutes easy warm up 
  2. 3 x 1-minute wind ups with a minute rest between (100 RPM pedal cadence)
  3. 5 minutes easy
  4. 5 minutes all out (hard at first, but not so hard that you can't complete the effort)
  5. 10 minutes easy
  6. 20-minute time trial effort (this is the test - like the previous 5-minute all out effort, keep in control, hard but steady, you don't want to over cook it and die at the end)
  7. 10 to 15 minute cool down
You then take your average power over the 20-minute hard effort, and subract 5% to get an estimate of your FTP.

Another popular and much simpler test is what I've always referred to as the Friel Protocol. It is:
  1. Warm up
  2. 30-minute time trial (this is the test) all by yourself (no training partners and not in a race - it should be done as if it was a race for the entire 30 minutes)
  3. 10 minutes into the test click the lap button on your heart rate / GPS device 
  4. When done look to see what your average heart rate was for the last 20 minutes - that number is an approximation of your Lactate Threshhold Heart Rate (LTHR)
  5. When done, look to see what your average power was for the entire 30 minutes - that number is an approximation of your FTP
It is elegant in that it yields an FTP in 30 minutes with no correction. And in the same test you also get you get a nice LTHR estimate from the last 20 minutes, and again no correction is applied. Essentially you are chopping off the first 10 minutes in which the heart rate climbs more rapidly up to homeostasis, and then settles to climb more gradually around the LTHR, around the last 20 minutes (see pic below, with the initial heart rate ramp up highlighted).

FTP Test, with initial heart rate ramp up highlighted

The main differences between Friel and Coggan then are:
  • Duration of test - the Friel test uses average power over 30-minutes, the Coggan test over 20-minutes.
  • Discount to calculate FTP - the Coggan average power is discounted by 5%, there is no correction on the Friel test.
  • Warm up - the Coggan method tires you out with a hard warm up, the Friel warm up is easier (but the test is longer).
Friel has argued that no correction is needed because when you do a test alone, you feel sorry for yourself, and without the adrenaline of a race situation to push you, you simply can't push yourself hard enough.

And I totally agree with him!

I propose that the 5% correction factor is excessive for most non-elite athletes.  Age group athletes just don't have the chronic tolerance for pain that elite and professional athletes do. These people, as part of their job, need to habitually push themselves to levels that they race at. The have formed a mental discipline and self-knowledge that allows them to dig deep and simulate a race situation within themselves. Psychologist and researcher Sian Beilock describes this ability well in her book Choke. Being able to simulate a race situation in your head, visualize all the accouterments of the competitive atmosphere, and then be able to push your body to suffer as though you were in it, is a honed skill. And it's a skill that pro and elite athletes usually possess, but that many age groupers do not!

Thus, I think the 5% correction is excessive for non-elite athletes, and a better estimate of FTP for age groupers is the Friel estimate, or the Coggan estimate, with the hard warm up but without the 5% reduction.

I've seen this for my own performances and those of nearly all my power meter customers. The long race time trials yield 1-hour average power levels within 1-2 watts of the predicted ones without correction. And I suspect this would be the case for most age groupers. I can back this up with numerous race time trial results and step test lab test results from the Institute of Human Performance at HKU from me and my customers!

FTP ramp test at HKU
One very negative repercussion of this then is that if we are discounting the FTP test number by 5%, then we are setting our training zones too low, and thus not getting the full effect that we should be getting from our training.

So with that I was surprised while reading Joe Friel's latest book, Fast After 50, that the FTP test he is now recommending is the Coggan test and not the 30 min test that most of us refer to as the "Friel" test!  In all his previous books (there are many!) and on his blog, he has always advocated the 30-minute test. So I asked him in an email about the change. His reply:
Hi Tony, 
Thanks for your note.  Good insights. I have used both methods (and more) but the Coggan 20-min test has become the standard, it seems. Do whatever works best for you and your clients. There is no right or wrong here. I also tell coaches to trust themselves when it comes to making an opinionated change in FTP based on recent training data. FTP changes a bit on a daily basis due to fatigue and other lifestyle factors not to mention psychological variables also. It even changes during a ride. Weather can affect it. So there are many variables. What we are aiming for is to get a ballpark number—albeit a small ballpark.
Good luck! 
Fair enough. I could find no research to validate the use of the 5% Coggan discount, and none that considers that it might be different for non-elite athletes.

So until I find some validation, I won't be discounting my own FTP test numbers when setting my power training zones, and I don't recommend that my customers do either, unless, that is, they are elite athletes.

Sunday, February 28, 2016

Saddle Comfort Part 1 - Friction

I tell all my bike fit customers dealing with saddle issues that we can boil (no pun intended) saddle discomfort issues down to 3 specific issues:

1) Friction
2) Bone Pain and Bruising
3) Numbness

This article deals with the first, Friction, probably the easiest to deal with.

Let's get real, serious cycling involves spending a lot of time putting a lot of load and heat on very little patches of skin.  It goes without saying that a proper bike fit and comfortable saddle are crucial to preventing these problems, but I am amazed  at how reluctant people sometimes are to use cycling-specific creams and lubricants. These are  effective, and can make the difference between a great ride and a plunge into hell. A plunge into hell being something like being in a stage race and having to deal with blistering in the perineal area. NOT fun. Anybody who's had bad chaffing, a boil or a blister in the tender parts knows what I am talking about. Fortunately, these traumas can often easily be prevented with the use of appropriate products.


At the Bike Energy Lab, we sell 3 different body lubes:

Assos Chamois Crème

  • from the Swiss maker of very comfortable and popular cycling shorts
  • probably the best known anti friction product available
  • thick cream that is essentially a thick magic potion of exotic ingredients like glycine soja oil, daucus carota sativa root, beta-carotene, beeswax, etc.
  • is slightly mentholated (Euro-style), giving a cool-heat sensation, but not ideal for women
  • can be applied to skin or for extra protection, in addition, directly to the chamois, but put too much on and you'll feel like you are wearing a soggy diaper
  • sells for HK$180 for a tub of 140ml

Brave Soldier Friction Zone

  • very similar to Assos but a bit more oily
  • magic potion with ingredients like soybean oil, beeswax, various seed oils and tee tree oil, aloe vera, and cocoa seed butter
  • slight menthol fragrance as well, so not great for women
  • costs HK$140 for a 74ml tube

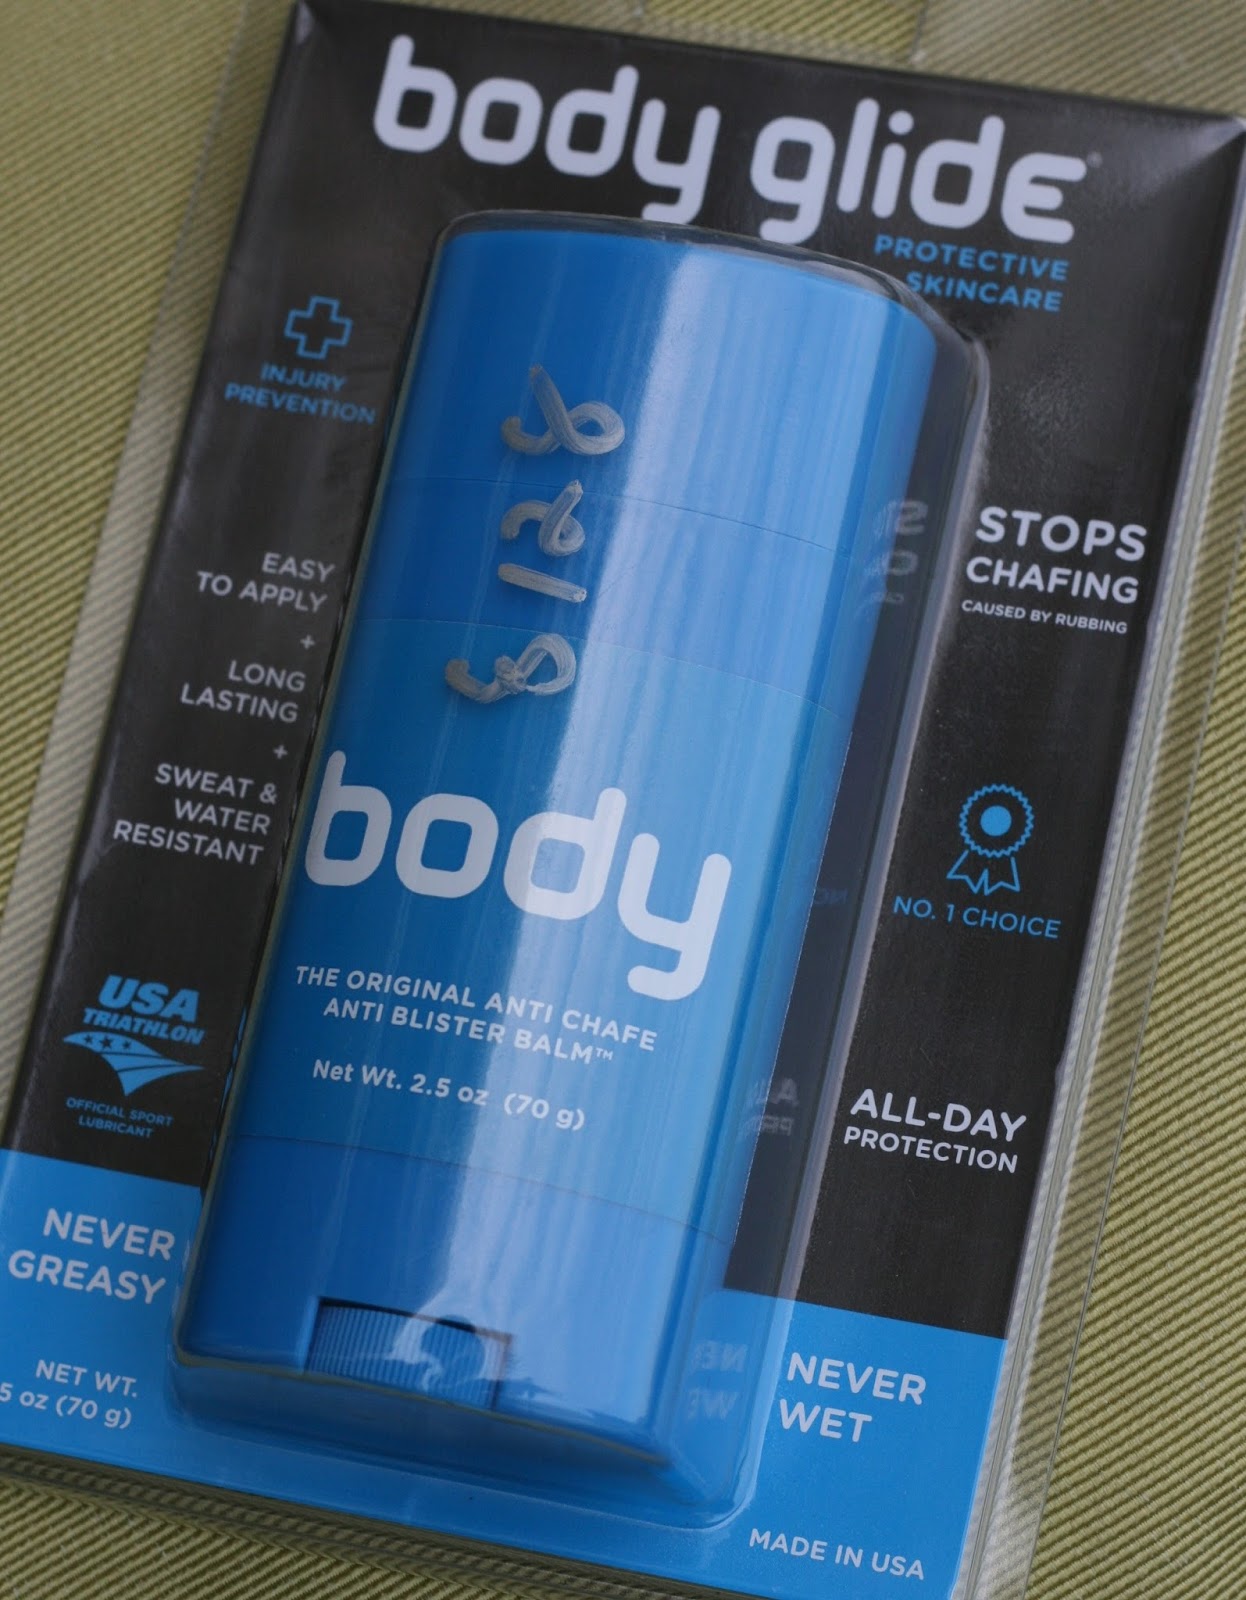
Body Glide

  • originally designed for runners to prevent chaffing and blistering
  • sold as a hard stick like deodorant
  • harder to apply to some areas of the body (like creases and folds)
  • unlike the two potions above, does not feel remotely greasy, but can feel a bit slippery, like putting on a coat of plastic
  • fragrance free and does not have any methol, so definitely better for women than the other two options above
  • costs $128 for a 70g stick


My fellow bike fitter and friend Jon Blyer at Acme Bicycle Co. in Brooklyn, N.Y., also has a great recipe for homemade chamois creme.

DIY Chamois Creme

Recipe:
8 oz Vaseline - for lubrication
1/2 oz Neosporin - for antibacterial protection
¼-½ tsp tea tree oil - because it smells since and has some antiseptic properties.

Directions: Warm the Vaseline in a bath of warm water. Once it gets soft, stir in the other ingredients. A large “tub” of his homemade cream costs around HK$40 to make.  Disclaimer: I can’t be responsible if any homemade cream like this one stains the chamois in your expensive shorts, but that said, any good quality short should be able to handle any of the above creams.  This one can be applied to body and shorts. It is long lasting, though perhaps not a long lasting as the 3 commercial options above.


All of the above products are extremely effective at preventing blisters and chaffing. I think any serious cyclist should use an anti-friction product on any outdoor ride longer than one hour. On tri and TT bikes, and for any indoor riding, because the position in this case is more static and the potential for friction issues greater, I recommend using an anti-friction product on each and every ride. 

I always say that unlike numbness, which should normally not be tolerated and is your body's way of telling you that you need a different saddle, it's sometimes worth pushing through with a saddle you don't think you might tolerate at first because of friction, as long as an appropriate anti-friction product is used. A saddle that you may not think is the perfect saddle for you just may be once you do.

So with a customer who was minor complaints with a new saddle, perhaps slight hot spots, or light blistering, and that person has not used any creams prior, I will recommend that it MAY BE worth pushing through for a few weeks with the use of creams.

It is certainly true that some areas of the skin, in between the legs and in the perineal area, sometimes just don't adapt, and the skin just won't get thick enough, and if things are trending worse after 2-3 weeks, I'll recommend moving on to a different saddle.

Sunday, January 3, 2016

New UCI Rule Change on Saddle Angle


Relief for the perineum! Good news for customers riding UCI-regulated time trials (including local races here in Hong Kong). The former rule required an ISM-type saddle to be at most 2.5 degrees nose down. Now the mfg-recommended 4-5 degrees will be UCI legal, finally!

See information on the new ruling here:
Ball Breaking Saddle Rules Updated
And a good rundown on upcoming rule changes here:
Q&A with UCI technical manager Mark Barfield

Sunday, March 22, 2015

How do I Calibrate my Powertap G3 with my Garmin Computer?


I love the Powertap for it's ease of use, simplicity, and industry-leading price point for an accurate power unit. Powertap units, certainly the third generation of them, just work. They are robust, durable, and accurate.

As a Powertap retailer, the first question I invariably get from a customer who has just purchased a unit. The Powertap web site and documentation is surprisingly barren of any procedure for how it should be done on a Garmin, and in fact the data that the Garmin presents the user has changed recently in newer Garmin firmware, just because Garmin made it so. Powertap is a completely distinct company and has limited input in just how Garmin sets up its firmware and its calibration functions.

Here's my take on Calibrating a Powertap G3:

When you "calibrate" a Powertap on a Garmin, you are not in fact calibrating anything, you are just forcing the Garmin unit to recognize what a zero load condition looks like, i.e. manual zero, or zeroing the torque.

So the procedure is:
- spin your pedals backwards to wake up the hub
- run the calibrate routine in your Garmin (while not sitting on the bike or applying weight to the pedals)
- then go riding

Previous generations of Garmin firmware simply read the sensor ID rather than the calibration value. Newer Garmin firmwares give you the calibration number (usually around zero, see how its determined here), and the torque, which will be zero since you have no weight on the bike or pedals. The calibration number varies with temperature.

Now, Garmin units let you turn on a function called "autozero" which zeros the torque whenever you are coasting. If you have this set (which I recommend) you don't really need to "calibrate" since the unit is always resetting the torque to zero when you are coasting down hills.

So you would only need to calibrate the unit if the temperature changed a lot since the last "calibration" and you wanted to make sure the power was really accurate before the first time you coasted down a hill that day, which is when it would automatically autozero for the first time. So in reality, you never need to calibrate if you have autozero set, which is the beauty of PT, but I do just to check the calibration number is reasonable, maybe once a week.

Also, when I am training I have my Garmin screen set to show me 3 sec power (I find anything less is just too jumpy, that's the nature of power). When I am coasting downhill I check every now and then that it does indeed read zero (after 3 seconds obviously). Incidentally I also like to track Lap Power, Last Lap Power, and Max Power, if I'm doing intervals. The Garmin also lets you choose other time average intervals, like 5 minutes, which some people find useful.

If you're really keen and curious you can actually truly calibrate the unit (i.e. check the accuracy and precision) yourself using that torque value it gives you on the Garmin calibration screen.
Two very similar procedures to accomplish this are given here and here (this is also called a stomp test as it involves stomping on, or putting a weight on, the pedals).

For a ridiculous amount of information well beyond what an average user would need, you can always refer to the Slowtwitch Official Powertap thread.  Alex Simmons has also posted some interesting information at his blog here though it is not specific to using a Powertap with a Garmin head unit (which is what most people seem to use these days) but rather to the old Powertap "Little Yellow Computer," or LYC.

Edited 2 May 2017 with new link to Powertap calibration offset values.


Tuesday, March 12, 2013

A Sweet Spot Protocol for Hong Kong

The members of the Lantau Buffalos Team Time Trial team are in a heated internal competition, as we had a few more riders than slots for the HKCA race.  We are using the TC10 course just outside Discovery Bay, Hong Kong, to chose the team.  Since this is a great basic test of fitness, the results can also be used to come up with a sweet spot for training for steady state events.  I've drafted the below and copied here in case anyone else might benefit from it.


HOW TO FIND YOUR SWEET SPOT FOR TRI AND TT TRAINING
Based on Friel Heart Rate Zones

Go out and do a test on the 16k TC10 course or any flat, 10 mile (16 km) course.
  • 20 minutes easy warm up
  • 3 x 1-minute wind ups with a minute rest between (100 RPM pedal cadence)
  • 5 minutes easy
  • 5 minutes all out (hard at first, but not so hard that you can't complete the effort)
  • 10 minutes easy
  •  25-30 minute time trial effort (like the previous 5-minute all out effort, keep in control, hard but steady, you don't want to over cook it and die at the end - INSERT YOUR 10 MILE COURSE HERE)
  • 10 to 15 minute cool down
Then, take the average heart rate over the last 20 minutes of the TC10 course (you can just eyeball the plot in Strava or Garmin Connect, or if more precision is necessary use a program like SportTracks or Training Peaks to insert a lap at the finish time minus 20 minutes). This number is your Lactate Threshold Heart Rate (LTHR).

Heart Rate Zones:
Then, use the factors below (from this link) to determine your HR zones.

Bike Zones
Zone 1 Less than 81% of LTHR 
Zone 2 81% to 89% of LTHR   
Zone 3 90% to 93% of LTHR   
Zone 4 94% to 99% of LTHR 
Zone 5a 100% to 102% of LTHR 
Zone 5b 103% to 106% of LTHR 
Zone 5c More than 106% of LTHR

More on HR training use the Friel zones can be found here, here, and here.

Sweet Spot:
The Sweet Spot for steady state racing (like triathlons and time trials, as opposed to road races, sprinting, etc.) is 95% of LTHR, plus or minus 5%.  So, for example, if my 20min average is 154bpm.  My sweet spot is 154 x 0.95 = 146, or a range of around 138-154bpm. Note that this corresponds to Friel's zones 3 and 4.

If you are training by power, use the average power over the ENTIRE TC10 test (not just the last 20min).  This is your Functional Threshold Power.  Your power "Sweet Spot" is at 90% of the FTP plus/minus 5%

The advantages of doing this test yourself over a set course and distance is that you are more likely to push yourself harder if it's a fixed distance, plus you might get some bragging rights on Strava!  You don't have to pay a lab to get the numbers, and it's easy to repeat and check your progress over time.  Note that your LTHR won't change much, but your power will increase and time decrease with training.

I don't  recommend any method that uses the 220-AGE formula  to determine heart rate training zones.  The 220-AGE formula has been completely discredited, and just from polling my own small network of bike fit customers, friends, and team mates, doesn't account for the very large range of variability of people's heart rates at threshold, which seems to have little correlation to age.

Wednesday, January 19, 2011

TTT Tips

Ahhh, the cool temperatures, the polluted wind, the yellow-blue sky.  It's January in Hong Kong again.  That means its time for the Hong Kong Cycling Association's Team Time Trial.  A big kick in the legs to wake them up to some hard training after a bit of time off.


For a good summary of how the team time trial works, Bike Radar has a great article on how it all works here.  The Lost River Cycling Club has some nice descriptions of the different types of pacelines here.  Note that the direction you pull off depends on the wind.  The guys behind the lead should be sheltered, the guys pulling off from the front do so into the wind, like this:
SINGLE / DOUBLE / ROTATING / ECHELON
Drawing taken from the book 
Bicycling Street Smarts by John Allen

If there is no wind, in Hong Kong (and the UK, Australia, New Zealand etc.), you pull off to the right.

Some more points: 

Be Smooth
!

The usual comment from many new riders to the team time trial is that the hardest part of the race is catching the train after doing a pull.  This implies that they were just pulling too hard, perhaps going well into anaerobic.

Easily the most important rule for team time trials is: DO NOT SURGE under any circumstances when taking the lead. When the front rider has finished their turn, the rider behind checks the speed on their computer and maintains that 
speed (assuming of course the road conditions remain constant).

The rider who has finished their pull moves to the windward side and decreases their speed slightly, allowing the other riders to pass. At least one member of the team will be riding near their anaerobic threshold, so if the lead rider accelerates they will be pushed so hard they may not finish. If no one is near their maximum, the team is not riding fast enough.

Stay Close!
The closer you are to the rider in front the less work you have to do. It is important to keep it tight. Don’t forget that if you are at the front you may have to gingerly pick a track around stealthy holes and obstacles. Better to do this than to point them out by taking the hands off the bars, which is rarely a good idea in an aero tuck on a TT bike. Consider calling out the really bad obstacles.


Stick Together!
We can all go out and do Lactate Threshold sessions by ourselves, and we now that some of us are fitter than others on any particular day, but it is important in the TTT to work as a TEAM.  It is important to keep the egos in check just for a few hours and work together. Some of the responsibilities the riders all have in this are: 
  1. If you are taking a pull at the front and feel strong, go ahead and  take a longer pull (say 1-2 minutes instead of the normal 30 secs); if you feel like accelerating, make sure you take a peek behind you to ensure that the train is still together, otherwise slow down;
  2. If you feel like dying and that the train is going too fast, take shorter pulls, (like 10-20 secs) and say "slow down" quietly as you drop to the back, communicate to the rest of guys that you are suffering, but DON'T just out of the blue, drop out altogether; 
  3. If you are the last guy in the train, try and help the next guy dropping in behind you.  If you feel strong, consider dropping back a tiny bit and pull the guy up (but be careful not to risk getting dropped yourself!).  If you see that the guy is suffering, communicate it up the train.
After you have taken a turn at the front, the correct protocol is:
  1. Look over your right shoulder and take a peek behind you to make sure there are no trucks/cars/other teams coming.  This is the cue to everyone behind you that you are going to drop off.  There is no need to (like some other teams do) wave your arm frantically or yell out to the guy behind you to move up.  A good team will be in tune enough to anticipate when the guy in front will drop off.
  2. Gently drift to the right (or left if the wind is strong enough from the right that the echelon is going anti-clockwise)
  3. Do not abruptly turn right when done your turn.  If you do this, and if the guy behind you's wheel is overlapping a bit, you will manage to make the entire train crash spectacularly! 
About the time at the front:
Assuming a train of 5 or more riders, the following pull times seem to work well:
- 15-30secs for uphill or into a headwind,
- 30-40secs on the flat
- 40-60secs downhill when the speed is up.
And of course, if you are dying, TAKE SHORTER PULLS! Your teammates will appreciate that much more than seeing you drop out.

About pacing strategy:
It is easy to go off fast.  The heart is pumping, the adrenaline is rushing through your system, and you are keen to get going.  However, numerous studies have shown that going off too fast usually leads to slower TT times. In fact, nearly every single running world record that has ever been set had pacing that was equal or negatively split (that is, the pace in the first half was equal to or slower than in the second half).  It is probably safe to say that this would apply to most endurance events (and the hour record splits bear this out).  Triathlon coach Joe Friel has called "Poor Ability to Pace" the number one mistake of athletes.

So what works? A "J" shape for the pace is usually ideal.  To an extent, accept that the adrenaline will keep things going at a good clip initially.  Settle in to a slower more comfortable and realistic pace, and finish off with a bang, keeping in mind that a negative split is important, as is keeping the pace of the group aerobic right until nearly the end. A good way to monitor this is with a power meter. A heart rate monitor can also be used, in conjunction with bike speed, knowing that heart rate will drift up naturally in a long event, even if perceived exertion does not.

What about hills or strong winds?
Should the pace pick up, stay the same, or slow down?  I've often wondered about this and how it would affect the outcome of a race. I finally found a solution based on scientific approach based on minimizing exposure to the hill or wind, in order to minimize the energy cost.  These guidelines are the result (based on a single rider):
  • Coast at >50km/h
  • Pedal Easy at >40km/h
  • Pedal Steady at >30km/h
  • Pedal Mod-Hard at >20km/h
  • Pedal Hard at >10km/h
So, for the faster speeds of a TTT, perhaps a 10kph adjustment might be justifiable?  Thus, if the team was on a downhill and it's speed was greater than 60kph, it would be better to just coast.  However, if the hill was so steep that the speed up the hill was below 20kph, it would make sense to go hard.

Some other useful pacing tips (from individual time trialing) can be found here and here.

About the Race Plan:
Since this is a team effort, it is important to have all the riders on the same page at all times.  One way to help achieve this is with a race plan.  Some of the things that need to be discussed before the race starts are:
  • Starting order
  • Timing – what time targets are you aiming for that negative split?
  • Speed - what speed is required to achieve planned splits?
  • Mechanical issues -what to do if someone has a flat or a mechanical problem 
  • Nutrition
  • Team members getting dropped

About the gear
:
Lots has been written about the cost effectiveness of TT bikes, aero accessories, bike fittings, and other aids (see here and here).   That said, it doesn't always make sense to rush out and buy aero bars.  Most people I see with tri bars on a road bike have made their bikes heavier, and made themselves slower and less powerful. This has finally been pointed out in the mainstream cycling press and will be the subject of a detailed post to come.  That said, an aero helmet is usually a worthwhile purchase. However, the best return on investment, by far, is TRAINING, and preferably focused, TT specific training at lactate threshold or just below, in the sweet spot.

Happy training!