Monday, July 9, 2018

Battery for Garmin Glo


Need a new battery?

I've used a Garmin Glo Bluetooth GPS for a few years now.  It does a great job giving a fast, accurate GPS position to an iOS or Android devices and is very useful for things like in-aircraft applications, where you may want a more sensitive GPS receiver than the one in your phone.


It's available in new and refurbished versions online for reasonable pricing, typically less than US$99.  However, after a few years, the batteries fade, and if you haven't used it for awhile, the battery may not work at all, due to a cut-off circuit within the battery in case of very low voltage.  To get around this I've "jumped" the battery (using a 9V Ni-Cad) battery to get it working again, but often when you're at this point, you probably just need a new one.

That said, it's almost impossible to find a replacement battery for it.  The local Garmin distributor here in Hong Kong won't sell it, Garmin USA doesn't sell it, and even if you find one online, chances are the seller won't ship it to you due to dangerous goods restrictions on Li-Ion battery shipments.

The spare battery has had different part numbers over the years, all of which are discontinued or seem impossible to find:
 010-11935-00
 010-10840-00
 361-00031-00
 IA4V310A2
 BTC-GM10SL

Well, here's the secret:

It turns out that you can use a standard battery for a Nokia 3600 phone, and it'll work perfectly.  Chances are your local phone shop has dozens of these on-hand and can't sell them because no one uses these old, but once extremely popular, Nokia phones.  The Nokia part number is NK3600, and it is the exact same spec as the Garmin Glo battery.  Now you know! Use this information at your own risk, it's not something that Garmin saw fit to tell me, but it just works.


Garmin Glo Battery Issues and Status Indications

While troubleshooting my previously dying Garmin Glo battery, I noticed some not-so-intuitive LED status indications.  Aviation retailer Transair, has a good video that demonstrates this. It is very easy to mistake the "battery faulty" indication for the "battery charging normally" indication.

Green/Amber LED
  • Green-Green-Amber lights blinking: normal charging.  After a full charge, the LED goes off completely and you can unplug the mini-USB charger. A good battery should give you 10-12 hours of use.
  • Green-Amber / Green-Amber (alternating) lights blinking: fault with the battery, you probably need a new one.
  • Green solid light: GPS is connected to satellites.

Blue LED
  • Blue light blinking: looking for a Bluetooth device to pair with.
  • Blue solid light: paired with said device.


Thursday, January 4, 2018

Oval Chainrings as Treatment for a Hamstring Injury


I have to start this post by saying I've always been the world's biggest skeptic when it comes to oval chainrings. When I first started working in a bike shop in the mid-eighties, Shimano had a huge marketing push on Biopace, claiming less effort and fresher legs. Despite what Sheldon Brown said, I could never feel any benefit to chainrings that were anything but round.

Photo credit: Ebay seller bicyclists_retreat

Fast-track to the 21st century, when in 2014 I listened with pleasure as one of my favourite podcasters, Tri-Talk's David Warden, completely trashed Rotor's Q-rings. In Episode 71, triathlon coach Dave Warden put the Q rings through a trial using Computrainer, side by side with regular round rings. In this N=2 experiment, he found that power output using Q rings was significantly less than round rings. The experiment appears to be very well designed, controlled and executed. However, though I think Dave's methodology and knowledge are great, I acknowledge that it's one guy's experiment, and certainly not up to the standard of a peer-reviewed study. Still, after listening to the podcast, you will seriously doubt any potential benefit of Q-rings. Dave himself has said he has since stopped recommending Q-rings to his coached athletes.

So I must say I was intrigued when Bradley Wiggins won the Tour de France using Osymetric rings in 2012. Chris Froome also started using them in 2011 as he says in this Cycling Weekly video, and has won three Tours on them.  

Photo credit: Cycling Weekly

Osymetric rings have significantly more ovality than anything I have seen before. They are quite different from Biopace (which seemed to have misplaced the ovoid altogether) and much more exaggerated than Rotor's Q-rings. A bit more research in the company revealed that it was a small operation run out of France by Jean-Louis Talo, with no affiliation to any major parts manufacturer and their marketing machines. He didn't actually sponsor any of the riders using his chainrings, and some have had to request waivers from their sponsors to use them! Interesting, and very unusual for the world's best pros to use specialized equipment not for any money, but only because it gives them a performance advantage.

Still, I was doubtful... until... I developed a serious chronic case of proximal hamstring tendinopathy. I had been struggling with it for nearly a year. It's a somewhat uncommon running injury that is very hard to get rid of, described beautifully in this video by Dr. Jason Metzl. I blame long runs on rolling hills, terrain I can't really avoid where I live. The main symptoms are a loss of running speed and power, pain just below the butt when running uphill, and a sharp pain when sliding the leg back (doing a motion like scraping mud off your shoe). Thankfully, it hurt a lot less to ride a bike (compared to running), but I could feel it as a uncomfortable niggle. As a precaution I lowered my saddle somewhat, and raised the cockpit, which reduced the niggle, and I hoped that it would help the recovery (having stopped running altogether). But it occurred to me that a chainring designed to eliminate the "dead spot," that exact bit of the pedal stroke at the bottom where you "scrape" back, might eliminate the niggle. I now had an excuse to overlook my skepticism and slap some oval rings on my bike! Just like Wiggo and Froomie!

And the crazy thing is that it worked. Immediately I could feel that any soreness I felt at the bottom of the pedal stroke was gone. Where running was a 8/10 on the pain scale, and normal bike riding a 3/10, riding with Osymetric rings was a 1/10. I didn't now have to forego my favorite sport of cycling because I had injured myself running! Life was good again!


Osymetric Rings on my tri bike.  And yes, the shifting is absolute crap.

Within a few months of riding with oval rings my injury completely disappeared. A few months of riding on Osymetric oval rings did what nearly a year of physiotherapy, including deep tissue work, stretching, and acupuncture, could not do.

This result is completely unscientific, N=1, but it is consistent with what we know about muscle firing. It does make sense that unloading those muscles and tendons in the kinetic chain behind the leg would help an injury there heal. With a round chainring, there is significant recruitment of the hamstring (biceps femoris) at the dead spot at the bottom of the stroke, as shown in the image below, derived from electromyography (EMG) data, and it makes sense that a very oval ring might push some of load that further up the downstroke, to the quads (vastus medialis, intermedius and iateralis and rectus femoris). 

Image credit: Stephen Thordarson


Unfortunately the only studies that have been done on oval rings seem to be manufacturer-sponsored, and designed to show a power benefit, or a reduction in effort (heart rate, lactate, VO2). And all the studies are unconvincing if not dubious. Good summaries of the available literature can be found here and here.  My own rudimentary research doing FTP tests on different days, on the same course, in similar environmental conditions, showed no clear power benefit (and no handicap either).  Oval rings can exaggerate power readings on a crank-based powemeter, so I used a hub-based Powertap, 

It would be interesting to see if the rationale for oval rings could be made more convincing if the studies focused on helping riders deal with pathologies like hamstring tendionopathy, or in that vein, how it might reduce the loads on running muscles, which could make triathletes that much more comfortable after a transition from bike to run.


Disclosure: This unit was provided to my shop by the local distributor at wholesale pricing.  Pricing was somewhat more than comparable round chainrings from Sram or Shimano.  I received no benefit from any manufacturer in writing this article.

Thursday, May 25, 2017

FTP Testing - Coggan or Friel? Is the 5% discount too much?

Dr. Justin Choo on the Dragon's ITT course, North Lantau


Functional Threshold Power (FTP) is defined as the average power that you can maintain on the bike for a one-hour, all out, race effort.

Knowing your FTP allows you to set zones that form the basis for your training. There are many different protocols used to test for FTP. Two of the most widely used methods are the Coggan test, and the Friel test.

Presented in his book Training and Racing with a Power Meter (widely considered to be the power training bible), the Coggan Protocol is essentially as follows:
  1. 20 minutes easy warm up 
  2. 3 x 1-minute wind ups with a minute rest between (100 RPM pedal cadence)
  3. 5 minutes easy
  4. 5 minutes all out (hard at first, but not so hard that you can't complete the effort)
  5. 10 minutes easy
  6. 20-minute time trial effort (this is the test - like the previous 5-minute all out effort, keep in control, hard but steady, you don't want to over cook it and die at the end)
  7. 10 to 15 minute cool down
You then take your average power over the 20-minute hard effort, and subract 5% to get an estimate of your FTP.

Another popular and much simpler test is what I've always referred to as the Friel Protocol. It is:
  1. Warm up
  2. 30-minute time trial (this is the test) all by yourself (no training partners and not in a race - it should be done as if it was a race for the entire 30 minutes)
  3. 10 minutes into the test click the lap button on your heart rate / GPS device 
  4. When done look to see what your average heart rate was for the last 20 minutes - that number is an approximation of your Lactate Threshhold Heart Rate (LTHR)
  5. When done, look to see what your average power was for the entire 30 minutes - that number is an approximation of your FTP
It is elegant in that it yields an FTP in 30 minutes with no correction. And in the same test you also get you get a nice LTHR estimate from the last 20 minutes, and again no correction is applied. Essentially you are chopping off the first 10 minutes in which the heart rate climbs more rapidly up to homeostasis, and then settles to climb more gradually around the LTHR, around the last 20 minutes (see pic below, with the initial heart rate ramp up highlighted).

FTP Test, with initial heart rate ramp up highlighted

The main differences between Friel and Coggan then are:
  • Duration of test - the Friel test uses average power over 30-minutes, the Coggan test over 20-minutes.
  • Discount to calculate FTP - the Coggan average power is discounted by 5%, there is no correction on the Friel test.
  • Warm up - the Coggan method tires you out with a hard warm up, the Friel warm up is easier (but the test is longer).
Friel has argued that no correction is needed because when you do a test alone, you feel sorry for yourself, and without the adrenaline of a race situation to push you, you simply can't push yourself hard enough.

And I totally agree with him!

I propose that the 5% correction factor is excessive for most non-elite athletes.  Age group athletes just don't have the chronic tolerance for pain that elite and professional athletes do. These people, as part of their job, need to habitually push themselves to levels that they race at. The have formed a mental discipline and self-knowledge that allows them to dig deep and simulate a race situation within themselves. Psychologist and researcher Sian Beilock describes this ability well in her book Choke. Being able to simulate a race situation in your head, visualize all the accouterments of the competitive atmosphere, and then be able to push your body to suffer as though you were in it, is a honed skill. And it's a skill that pro and elite athletes usually possess, but that many age groupers do not!

Thus, I think the 5% correction is excessive for non-elite athletes, and a better estimate of FTP for age groupers is the Friel estimate, or the Coggan estimate, with the hard warm up but without the 5% reduction.

I've seen this for my own performances and those of nearly all my power meter customers. The long race time trials yield 1-hour average power levels within 1-2 watts of the predicted ones without correction. And I suspect this would be the case for most age groupers. I can back this up with numerous race time trial results and step test lab test results from the Institute of Human Performance at HKU from me and my customers!

FTP ramp test at HKU
One very negative repercussion of this then is that if we are discounting the FTP test number by 5%, then we are setting our training zones too low, and thus not getting the full effect that we should be getting from our training.

So with that I was surprised while reading Joe Friel's latest book, Fast After 50, that the FTP test he is now recommending is the Coggan test and not the 30 min test that most of us refer to as the "Friel" test!  In all his previous books (there are many!) and on his blog, he has always advocated the 30-minute test. So I asked him in an email about the change. His reply:
Hi Tony, 
Thanks for your note.  Good insights. I have used both methods (and more) but the Coggan 20-min test has become the standard, it seems. Do whatever works best for you and your clients. There is no right or wrong here. I also tell coaches to trust themselves when it comes to making an opinionated change in FTP based on recent training data. FTP changes a bit on a daily basis due to fatigue and other lifestyle factors not to mention psychological variables also. It even changes during a ride. Weather can affect it. So there are many variables. What we are aiming for is to get a ballpark number—albeit a small ballpark.
Good luck! 
Fair enough. I could find no research to validate the use of the 5% Coggan discount, and none that considers that it might be different for non-elite athletes.

So until I find some validation, I won't be discounting my own FTP test numbers when setting my power training zones, and I don't recommend that my customers do either, unless, that is, they are elite athletes.

Sunday, February 28, 2016

Saddle Comfort Part 1 - Friction

I tell all my bike fit customers dealing with saddle issues that we can boil (no pun intended) saddle discomfort issues down to 3 specific issues:

1) Friction
2) Bone Pain and Bruising
3) Numbness

This article deals with the first, Friction, probably the easiest to deal with.

Let's get real, serious cycling involves spending a lot of time putting a lot of load and heat on very little patches of skin.  It goes without saying that a proper bike fit and comfortable saddle are crucial to preventing these problems, but I am amazed  at how reluctant people sometimes are to use cycling-specific creams and lubricants. These are  effective, and can make the difference between a great ride and a plunge into hell. A plunge into hell being something like being in a stage race and having to deal with blistering in the perineal area. NOT fun. Anybody who's had bad chaffing, a boil or a blister in the tender parts knows what I am talking about. Fortunately, these traumas can often easily be prevented with the use of appropriate products.


At the Bike Energy Lab, we sell 3 different body lubes:

Assos Chamois Crème

  • from the Swiss maker of very comfortable and popular cycling shorts
  • probably the best known anti friction product available
  • thick cream that is essentially a thick magic potion of exotic ingredients like glycine soja oil, daucus carota sativa root, beta-carotene, beeswax, etc.
  • is slightly mentholated (Euro-style), giving a cool-heat sensation, but not ideal for women
  • can be applied to skin or for extra protection, in addition, directly to the chamois, but put too much on and you'll feel like you are wearing a soggy diaper
  • sells for HK$180 for a tub of 140ml

Brave Soldier Friction Zone

  • very similar to Assos but a bit more oily
  • magic potion with ingredients like soybean oil, beeswax, various seed oils and tee tree oil, aloe vera, and cocoa seed butter
  • slight menthol fragrance as well, so not great for women
  • costs HK$140 for a 74ml tube

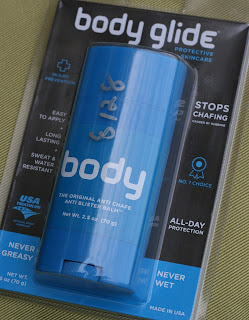
Body Glide

  • originally designed for runners to prevent chaffing and blistering
  • sold as a hard stick like deodorant
  • harder to apply to some areas of the body (like creases and folds)
  • unlike the two potions above, does not feel remotely greasy, but can feel a bit slippery, like putting on a coat of plastic
  • fragrance free and does not have any methol, so definitely better for women than the other two options above
  • costs $128 for a 70g stick


My fellow bike fitter and friend Jon Blyer at Acme Bicycle Co. in Brooklyn, N.Y., also has a great recipe for homemade chamois creme.

DIY Chamois Creme

Recipe:
8 oz Vaseline - for lubrication
1/2 oz Neosporin - for antibacterial protection
¼-½ tsp tea tree oil - because it smells since and has some antiseptic properties.

Directions: Warm the Vaseline in a bath of warm water. Once it gets soft, stir in the other ingredients. A large “tub” of his homemade cream costs around HK$40 to make.  Disclaimer: I can’t be responsible if any homemade cream like this one stains the chamois in your expensive shorts, but that said, any good quality short should be able to handle any of the above creams.  This one can be applied to body and shorts. It is long lasting, though perhaps not a long lasting as the 3 commercial options above.


All of the above products are extremely effective at preventing blisters and chaffing. I think any serious cyclist should use an anti-friction product on any outdoor ride longer than one hour. On tri and TT bikes, and for any indoor riding, because the position in this case is more static and the potential for friction issues greater, I recommend using an anti-friction product on each and every ride. 

I always say that unlike numbness, which should normally not be tolerated and is your body's way of telling you that you need a different saddle, it's sometimes worth pushing through with a saddle you don't think you might tolerate at first because of friction, as long as an appropriate anti-friction product is used. A saddle that you may not think is the perfect saddle for you just may be once you do.

So with a customer who was minor complaints with a new saddle, perhaps slight hot spots, or light blistering, and that person has not used any creams prior, I will recommend that it MAY BE worth pushing through for a few weeks with the use of creams.

It is certainly true that some areas of the skin, in between the legs and in the perineal area, sometimes just don't adapt, and the skin just won't get thick enough, and if things are trending worse after 2-3 weeks, I'll recommend moving on to a different saddle.

Sunday, January 3, 2016

New UCI Rule Change on Saddle Angle


Relief for the perineum! Good news for customers riding UCI-regulated time trials (including local races here in Hong Kong). The former rule required an ISM-type saddle to be at most 2.5 degrees nose down. Now the mfg-recommended 4-5 degrees will be UCI legal, finally!

See information on the new ruling here:
Ball Breaking Saddle Rules Updated
And a good rundown on upcoming rule changes here:
Q&A with UCI technical manager Mark Barfield

Sunday, March 22, 2015

How do I Calibrate my Powertap G3 with my Garmin Computer?


I love the Powertap for it's ease of use, simplicity, and industry-leading price point for an accurate power unit. Powertap units, certainly the third generation of them, just work. They are robust, durable, and accurate.

As a Powertap retailer, the first question I invariably get from a customer who has just purchased a unit. The Powertap web site and documentation is surprisingly barren of any procedure for how it should be done on a Garmin, and in fact the data that the Garmin presents the user has changed recently in newer Garmin firmware, just because Garmin made it so. Powertap is a completely distinct company and has limited input in just how Garmin sets up its firmware and its calibration functions.

Here's my take on Calibrating a Powertap G3:

When you "calibrate" a Powertap on a Garmin, you are not in fact calibrating anything, you are just forcing the Garmin unit to recognize what a zero load condition looks like, i.e. manual zero, or zeroing the torque.

So the procedure is:
- spin your pedals backwards to wake up the hub
- run the calibrate routine in your Garmin (while not sitting on the bike or applying weight to the pedals)
- then go riding

Previous generations of Garmin firmware simply read the sensor ID rather than the calibration value. Newer Garmin firmwares give you the calibration number (usually around zero, see how its determined here), and the torque, which will be zero since you have no weight on the bike or pedals. The calibration number varies with temperature.

Now, Garmin units let you turn on a function called "autozero" which zeros the torque whenever you are coasting. If you have this set (which I recommend) you don't really need to "calibrate" since the unit is always resetting the torque to zero when you are coasting down hills.

So you would only need to calibrate the unit if the temperature changed a lot since the last "calibration" and you wanted to make sure the power was really accurate before the first time you coasted down a hill that day, which is when it would automatically autozero for the first time. So in reality, you never need to calibrate if you have autozero set, which is the beauty of PT, but I do just to check the calibration number is reasonable, maybe once a week.

Also, when I am training I have my Garmin screen set to show me 3 sec power (I find anything less is just too jumpy, that's the nature of power). When I am coasting downhill I check every now and then that it does indeed read zero (after 3 seconds obviously). Incidentally I also like to track Lap Power, Last Lap Power, and Max Power, if I'm doing intervals. The Garmin also lets you choose other time average intervals, like 5 minutes, which some people find useful.

If you're really keen and curious you can actually truly calibrate the unit (i.e. check the accuracy and precision) yourself using that torque value it gives you on the Garmin calibration screen.
Two very similar procedures to accomplish this are given here and here (this is also called a stomp test as it involves stomping on, or putting a weight on, the pedals).

For a ridiculous amount of information well beyond what an average user would need, you can always refer to the Slowtwitch Official Powertap thread.  Alex Simmons has also posted some interesting information at his blog here though it is not specific to using a Powertap with a Garmin head unit (which is what most people seem to use these days) but rather to the old Powertap "Little Yellow Computer," or LYC.

Edited 2 May 2017 with new link to Powertap calibration offset values.


Tuesday, November 18, 2014

Syncing Golden Cheetah Across Multiple Computers Using Dropbox


As far as power analysis tools go, Golden Cheetah is the ultimate bike geek's tool.  It is robust, powerful, embodies some of the most useful tools available for training with power, and best of all, it's open source and free to use.

However, unlike say Training Peaks, Golden Cheetah (GC) data does not reside in the cloud. At this point (GC version 3.1), the database data for all your workouts resides in a single directory on your computer.  It's quite easy to port the database from one computer to another, say when migrating to a newer machine, just by transferring the directory which holds your workout data to the new machine.  But there is no way at this point to natively sync the data across multiple machines.

In my case, which I'm sure would be like that of many others, I have a desktop PC where I have diligently loaded all my workouts for analysis in GC.  I would like to be able to access this data while on the road on my laptop PC.  But in addition to this, I would also like to be able to edit the database (i.e. add new workouts) while on the road using my laptop, and have those workouts uploaded to a cloud database so I can view them in GC on my work PC when I get back from a trip.

There are other methods of doing this, namely involving symbolic links, as described here and here. Another way is to install the program on a USB stick.  However, the advantage of using the sync option below is that is is robust and potentially safer, in that that the data will remain resident and synced on all machines running GC.

So here's how to do it.  You'll need:

  • Two or more computers and the same version of GC running on each of those computers (current version is V3.1)
  • A Dropbox Account
  • A nifty program called Dropbox Folder Sync.  This allows you to use Windows Explorer to find any directory on your computer and Sync it to Dropbox.  Dropbox doesn't let you do this yet, you have to drag a directory to the Dropbox folder for the sync to happen.  So in essence, this add-on preserves the GC default directory location intact and creates a symbolic link to the Dropbox Directory for you.

Let's call "Computer 1" the original machine with all your workout data.  In my case, it's my desktop.

We'll call "Computer 2" the new machine that you want to access the original database.  You may also use this machine to add new workouts.  So in my case, it's my laptop, and I'll upload workouts to this computer while on the road.

The main trick with this is figuring out where the GC files reside on each machine, which is easy to do actually.

Just open GC on each computer and click on the Help Menu on the menu bar.


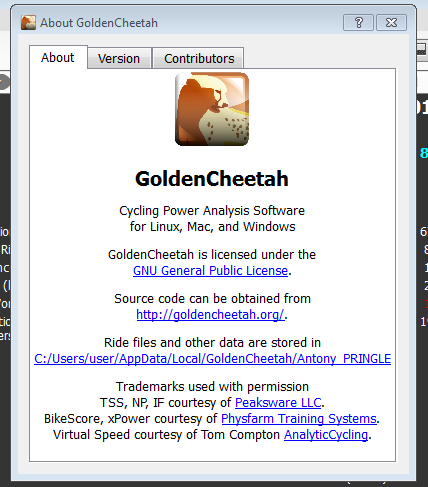
Under Help, click on About and you'll see something like this window:


So the GC programmers have kindly told us exactly where the files are located.  In my case, it's at C:/Users/user/AppData/Local/GoldenCheetah/your_name.  If you right click on this item you can copy it to the Clipboard and into Notepad or somewhere so you can refer to it later.  The name will correspond to the name you wrote in GC after you first installed it on your computer.

Then, go to this location on your computer (you may want to change settings in Windows Explorer (I'm using Windows 7) so you can see hidden folders.

Then right click on that directory and Sync it with Dropbox. The "Dropbox Folder Sync > Sync with Dropbox" menu item that will have been added by the Dropbox Folder Sync Add On.


An little arrow will  magically appear on the folder and the files will start to appear in your Dropbox folder.

Now, that the data is synced to Dropbox, we can move it to Computer 2.

In Computer 2, ensure you have the same version of GC running.  To keep things clean, ensure your user name in GC on computer 2 is spelled exactly the same as on Computer 1.  GC will crease a user database directory with the same name as on Computer 1.  If you have previously used a different name or different spelling, use the "Athlete > Open Window > New Athlete" function on the menu bar to create an account with exactly the same name you used on Computer 1.  You can delete the old name (just by deleting the old directory) at a later time.

Using Windows Explorer, find the database directory on Computer 2.  If you're using the same version of Windows, it will be a very similar location to the one you found on Computer 1 (C:/Users/user/AppData/Local/GoldenCheetah/your_name).  Go into that your_name directory, and, very important, ERASE any files there.  This will ensure that the files from Computer 1 are cleanly copied into that location during the sync.

Go back up one level back to the name, and again, right click to access the "Dropbox Folder Sync > Sync with Dropbox" menu item as you did above on Computer 1, and click on it to start the sync.  You'll be asked if you want to MERGE files, to which you'll answer yes.  (This item is critical.  Dropbox allows you to merge files this way, Microsoft's OneDrive does not at this point, so you can't use that as your cloud location for GC files).

The GC database files will now magically appear in the database name folder on Computer 2.

Any changes you make in Golden Cheetah on either computer show now be reflected in the Dropbox folder, and hence in the user database folder on each computer!

Hope this works for you!  Let me know using the comments if it doesn't.


Wednesday, February 26, 2014

Shopping for a Bike Fitter?


The best article I have ever read on this subject is this one by Dan Empfield.  In an article published in the "early days" of Slowtwitch, he succinctly describes all the "hallmarks of a good tri bike fitter."   I agree with him, and the article could equality hold for a good road bike fitter by substituting "road" for "tri" throughout the article.

Now, he's biased of course. How? Because he's a fitter and the characteristics he describes are his own. But that said, he is generally acknowledged to be a pretty damn good fitter, and the fact he regularly packs his California 'compound' with fitters and bike manufacturers wanting to learn from him attests to that fact. He most definitely knows whereof he speaks.

So with that, in full disclosure, I am also a fitter, and the tips I describe below do suspiciously sound like things I do, and qualifications I have, but I think they would pass an external test of a higher order.

I  started working in bike shops in Canada over 30 years ago, even before I was legally permitted to work, which led me to a job at the best shop in town when I turned 16.  This is also around when I started to race bikes.

The consummate bike geek, I loved bikes so much I thought I might do an education in engineering.  Though when I graduated, iconic Canadian brands like Cervelo and Race Face had not yet appeared, and I was content working in aviation between bike shop jobs, which conveniently draws on the same knowledge base, namely ergonomics (the fitting of humans to machines), aerodynamics, and lightweight materials and structures.

I've worked at some of the best bike shops in Canada, and more recently in Hong Kong, developing a comprehensive understanding of bicycle frame geometry and design principles, and a deep knowledge of component and equipment selection. I continue in my passion for cycling as a Retul and FIST-certified bike fitter at the Hong Kong-based Bike Energy Lab, and still continue to race in local cycling and triathlon events.

Coach and Fitter Matt Steinmetz of 51 Speedshop

How to Chose a Bike Fitter

Thanks to growing awareness of the benefits of fitness, increased increased cycling, and excellent performances by Asian athletes at international cycling events, cycling and triathlon are experiencing rapid growth in Asia and Hong Kong. I am amazed when I go to a race at just how many people are riding awesome equipment, and just how much people are willing to spend on their bikes. However, there are certainly some fairly sub-optimal, potentially dangerous, and simply odd positions out there. Some cyclists ignore the fact that with an expense of only a very small fraction of what they have spent on their bike, they could go significantly faster, for less effort, in more comfort. Thankfully, with the growth of the sport has come the growth of the discipline of bike fitting. Five years ago, the popular triathlon website Slowtwitch.com listed only four fitters in Australasia. It now lists 14.

Finding a fitter can be difficult, or it can be easy. It can almost always be said that any fitting is better than none, but why not ensure that your time and money is well spent? Here are few easy questions to ask a prospective fitter before choosing to give him or her your hard-earned time and money.

1. How much does it cost?

A bike fitter needs to be supported by tools. These include not only a large complement of bicycle repair tools, but also highly specialized fitting tools. A full Retul motion capture system can cost upwards of $14,000 USD, while a fitting bike might cost an additional $6,000 to $12,000. That investment is reflected in the price of a fitting. Depending on the time and degree of precision involved, bike fits typically range in price from $150 to $400 USD. 


2. What's your background?

Most fitters these days tend to have a background either in engineering or the health sciences, such as a fitness trainer or coach, exercise physiologist, physical therapist, chiropractor, or sports medicine practitioner.

Although a university-level education is not the only way to achieve this knowledge and discipline, it certainly is one way, and a degree (or two) in a related subject certainly demonstrates some depth of knowledge and familiarity with the scientific process. Science is important because without it, we don't have the justification needed to place a cyclist in one position versus another. Without it, a recommendation to make a positional change is just one person's opinion.

Since you probably don't train like people did in the early 1900s, why should you be fitted by a fitter who uses trial and error methods from that era? What distinguishes modern bike fitting from old-school fitting is science, and I strongly feel that a passion for science, and learning about the newest technologies and methods, is essential.

Red Flag: watch out for a fitter who hides behind science. Although science gives us beautifully precise terms to explain various bio-mechanical conditions, make sure he or she can explain things in terms you understand. For example, if your prospective fitter asks you something like: "Are you femorally rotated? Are you seeking athletic ambidexterity and would you like me to correct that pelvic obliquity?" and you have no idea what he or she is taking about, ask him or her to speak your language.


3. What certifications do you have?

There are many individuals and bike shops conducting bike fits these days. Some are better than others, some have certifications, and some don't. Some have certifications from bike manufacturers, some from independent fitting organizations or schools. Some of these certifications require the fitter to pass a knowledge test, some don't. Some require that a continuing education or re-certification program be followed to ensure continued competency, others are granted for life. Suffice to say that not all certifications are equal, and it would be difficult for the average cyclist or triathlete consumer to easily distinguish the benefits of one from the other.

As a rule of thumb, I recommend that your prospective fitter have at least one or two certifications. Also, no more than one of these should be from a manufacturer, since a manufacturer's protocol will obviously tend to focus on and favour a specific manufacturer's bikes (one example is the BG Fit certification from Specialized).

Some independent fitting protocols with certified fitters in Asia include FIST/Slowtwich, Bikefit Systems, and Retul (which actually has just been acquired by bike manufacturer Specialized, but it for now works independently from the Specialized BG Fit certification process).


4. Do you ride?

The only way your fitter will have any empathy for how you feel at the end of a five hour ride is if the fitter knows what it's like to ride for five hours! Just as you'd only hire a coach with a solid background and appreciation for the sport, best stick with a fitter who has put some solid hours in the saddle, just like you have (or will).


Photo Credit: Chi Fai Lam

5. What if I don't like how it feels? Do you have a warranty?

Luckily, most fits will result in a position that is (hopefully) better than the one you had. Realistically, it is doubtful that a fitter will have a money-back guarantee. All fittings involve an exchange of information and it is reasonable that the fitter will want to be properly compensated for providing the service and consultation. Do make sure that your fitter is receptive to a post-fit consultation and working with you with issues that might materialize outside of the fit studio. Indeed, despite what some fitters might tell you, it is impossible to duplicate a long and hard outdoor session in a studio.

Red Flag: Beware of any power guarantees. Any fitter who promises that a fitting will turn you into a 20% more powerful cyclist doesn't understand how cycling works. Most of the power produced by a cyclist is used to overcome aerodynamic drag. It is quite easy for a fitter to give a client a more powerful position, but if the effect that this position has on aerodynamic drag is not considered in detail, it will not make you faster. In fact, that "more-powerful" position might just make you a lot slower! Unless your prospective fitter has a wind tunnel, don't believe any spurious claims.


6. Do you have bike shop experience? 

If you value your bike, you'll appreciate a bike fitter who knows his or her way around a bike intimately. In the past few years we have seen the introduction of a plethora of new standards in bike design; things like completely new bottom bracket standards, integrated headset/stem designs, and complex electronic shifting systems. Ideally, a fitter will have experience working as a mechanic in a shop and will know how to property tighten a bolt to the proper torque specification, and how to gingerly move those Di2 electronic shifter cables out of the way to replace your aerobar without causing any damage. Having significant experience with lightweight bike parts and frames is critical, or you may end up walking out of the fitting with a broken bike part, or worse, a cracked frame! Make sure your fitter uses a torque wrench when tightening any critical fastener.

A fitter with solid shop experience will also be able to accomplish the job faster and with more safety as far as the bike is concerned.

7. Do you work in a bike shop or are you independent?

While some bike shops view fitting as an impediment to a quick sale (since they might actually have to find you a bike that fits, whether or not they have it in stock), some manufacturers have unabashedly resorted to using bike fitting as a marketing tool. While I think this is generally a positive development, it also tends to result in recommendations towards a bike from that manufacturer, so there is an inherent conflict of interest.

One definite advantage of working with a fitter in a big bike shop is the easy availability of mechanics, parts and tools. One disadvantage is that the fitter may be under some pressure to upsell you parts you may not really need, and he or she might want to push on you a bike or parts that happen to be in stock, to keep that inventory moving. An independent fitter is well placed to give advice and recommendations tailored only to your needs regardless of stock availability, or your ability to afford them. However, do make sure that an independent fitter has a reasonable selection of specialized bike tools and equipment.

8. How long have you been fitting? How many fits have you done?

Perhaps more important than any other factor discussed above is a fitter's experience fitting people to bikes. A good experienced fitter doesn't need to rely on his or her bike fitting tools even though he has them. An experience fitter will have an internal database of bike fit problems and corrections, because he or she has seen many similar issues before. Ensure that you are truly comfortable with any prospective fitter's level of experience. In this case, the more the better.

Red Flag: Beware of the "Bike Whisperer"-type who has all the answers. Bikes aren't animals and you can't whisper at them to make them fit properly. Also, no two customers are alike, and even the most experienced fitter hasn't solved all the world's bike fit problems. A good fit is the result of a collaborative process. Sometimes solutions to fit problems require a significant amount of investigation and iteration. You may need to trial a new position over a few days, and give some feedback to your fitter so that he or she can improve it. Make sure any prospective fitter is willing to work with your specific needs and idiosyncrasies, and won't simply fit you into a template. If your prospective fitter's motto is "my way or the wrong way," best steer away.

A thorough post-fit report is essential.

So ask these questions before going to that bike fitting. They will help ensure that whatever fitter you chose is someone you feel you can trust, someone you feel has your best interests at heart, and someone who can communicate with you in your language. The outcome will likely be a bike that fits better, and the knowledge that on that bike, you are as comfortable and fast as you can be.

Tuesday, March 12, 2013

A Sweet Spot Protocol for Hong Kong

The members of the Lantau Buffalos Team Time Trial team are in a heated internal competition, as we had a few more riders than slots for the HKCA race.  We are using the TC10 course just outside Discovery Bay, Hong Kong, to chose the team.  Since this is a great basic test of fitness, the results can also be used to come up with a sweet spot for training for steady state events.  I've drafted the below and copied here in case anyone else might benefit from it.


HOW TO FIND YOUR SWEET SPOT FOR TRI AND TT TRAINING
Based on Friel Heart Rate Zones

Go out and do a test on the 16k TC10 course or any flat, 10 mile (16 km) course.
  • 20 minutes easy warm up
  • 3 x 1-minute wind ups with a minute rest between (100 RPM pedal cadence)
  • 5 minutes easy
  • 5 minutes all out (hard at first, but not so hard that you can't complete the effort)
  • 10 minutes easy
  •  25-30 minute time trial effort (like the previous 5-minute all out effort, keep in control, hard but steady, you don't want to over cook it and die at the end - INSERT YOUR 10 MILE COURSE HERE)
  • 10 to 15 minute cool down
Then, take the average heart rate over the last 20 minutes of the TC10 course (you can just eyeball the plot in Strava or Garmin Connect, or if more precision is necessary use a program like SportTracks or Training Peaks to insert a lap at the finish time minus 20 minutes). This number is your Lactate Threshold Heart Rate (LTHR).

Heart Rate Zones:
Then, use the factors below (from this link) to determine your HR zones.

Bike Zones
Zone 1 Less than 81% of LTHR 
Zone 2 81% to 89% of LTHR   
Zone 3 90% to 93% of LTHR   
Zone 4 94% to 99% of LTHR 
Zone 5a 100% to 102% of LTHR 
Zone 5b 103% to 106% of LTHR 
Zone 5c More than 106% of LTHR

More on HR training use the Friel zones can be found here, here, and here.

Sweet Spot:
The Sweet Spot for steady state racing (like triathlons and time trials, as opposed to road races, sprinting, etc.) is 95% of LTHR, plus or minus 5%.  So, for example, if my 20min average is 154bpm.  My sweet spot is 154 x 0.95 = 146, or a range of around 138-154bpm. Note that this corresponds to Friel's zones 3 and 4.

If you are training by power, use the average power over the ENTIRE TC10 test (not just the last 20min).  This is your Functional Threshold Power.  Your power "Sweet Spot" is at 90% of the FTP plus/minus 5%

The advantages of doing this test yourself over a set course and distance is that you are more likely to push yourself harder if it's a fixed distance, plus you might get some bragging rights on Strava!  You don't have to pay a lab to get the numbers, and it's easy to repeat and check your progress over time.  Note that your LTHR won't change much, but your power will increase and time decrease with training.

I don't  recommend any method that uses the 220-AGE formula  to determine heart rate training zones.  The 220-AGE formula has been completely discredited, and just from polling my own small network of bike fit customers, friends, and team mates, doesn't account for the very large range of variability of people's heart rates at threshold, which seems to have little correlation to age.

Monday, June 13, 2011

Downloading Open Source Maps for Garmin Edge Computers


A not so widely advertised feature of the Garmin Edge cycling computers is the ability to use free maps from open sources. There are two main reasons why someone would want to this:
  • Garmin maps can be very expensive; or,
  • to get a map for an area not covered by Garmin maps.
An open source map downloaded this way will not natively provide for turn-by-turn navigation, though this function can easily be added by uploading a course (*.crs file) to the unit that has been pre-processed by Bike Route Toaster.

That said, for simple map navigation, these maps are great, free, and totally legit.

Here’s how to do it:

Select and Download the Map Area:

Download and install Mobile Atlas Creator (MobAC). Formerly known as TrekBuddy Atlas Creator, it is an open source (GPL) program which creates offline atlases for GPS handhelds and cell phone applications.

Install it (unzip it) and run it simply by clicking on the Mobile Atlas Creator.exe file (if you plan on using it a lot, just make a shortcut to this file on your Desktop). You’ll be presented with a screen that looks like this:


You can easily change the map area in view by zooming in and out with your mouse wheel. To move to the left and right simply move the mouse with the right mouse button pressed. You’ll note a scale for Zoom level in the upper left hand side of the map screen. Centre the screen on the area you would like to capture. 

Under map source in the margin on the left, you’ll see a drop down menu with various open map sources. Older versions of MobAC would let you view non-open-source maps, like those of Microsoft Maps and Google Maps, but these agencies required MobAC to remove these sources, and all that is available now are those maps from OpenStreetMap. This is fine for cycling actually, as I have found the best map for cycling is the OpenStreetMap Cyclemap. It shows off-road bike trails (including MTB trails), as well as elevation contours.

So, under the Map Source drop down menu, select OpenStreetMap Cyclemap. Under Zoom level, check only 14. Higher zoom levels do not work in the Edge devices, and lower zoom levels do not show up with enough detail. Note that unlike Google Maps on your Iphone or Android phone, which looks at distinct tiles on different levels when zooming in and out, Garmin devices let you look at one big picture map, and when you press + and – on the unit to zoom in and out, it just increases or decreases the magnification on that one big map, so it is critical that you use the right zoom level, and only one zoom level.

Now, give your map a name in the Name: box, and click on Add Selection. Your screen should look like this below: 


Then, simply click on Create atlas and your file will be created (*.kmz format) in the location specified.

Moving the kmz file to your unit then simply requires that you plug the Garmin unit in with USB cable, and transfer it to the right location, as follows:

Install the Custom Map on your Garmin Edge:

(Note, this procedure applies specifically to the Edge 800, but would be similar for the 705).

1. Plug your unit into your PC via the USB;

2. Open the directory for the SD card (assuming you have one, if you don’t, simply use the existing memory card in the unit, assuming there is enough space on it);

3. Create a directory inside the Garmin directory called CustomMaps (no space), so something like k:\Garmin\CustomMaps;


4. Move the .kmz file into it.

Then, disable the other maps in your Garmin 800

1. Unplug the unit from the PC and turn it on;

2. Go Menu > Settings (wrench icon) > System > Map > Select Information Map;

3. Click on the other maps and select Disable;

4. Click on the Custom Map HK_Territory (or whatever you've called it) and make sure it is Enabled.

That’s it!

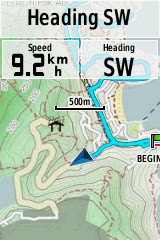
The result should look like this when looking at the map page in the unit. Note the detailed contours and trails, and even the golf course area in grey, around the Discovery Bay district here in Hong Kong:


Wednesday, January 19, 2011

TTT Tips

Ahhh, the cool temperatures, the polluted wind, the yellow-blue sky.  It's January in Hong Kong again.  That means its time for the Hong Kong Cycling Association's Team Time Trial.  A big kick in the legs to wake them up to some hard training after a bit of time off.


For a good summary of how the team time trial works, Bike Radar has a great article on how it all works here.  The Lost River Cycling Club has some nice descriptions of the different types of pacelines here.  Note that the direction you pull off depends on the wind.  The guys behind the lead should be sheltered, the guys pulling off from the front do so into the wind, like this:
SINGLE / DOUBLE / ROTATING / ECHELON
Drawing taken from the book 
Bicycling Street Smarts by John Allen

If there is no wind, in Hong Kong (and the UK, Australia, New Zealand etc.), you pull off to the right.

Some more points: 

Be Smooth
!

The usual comment from many new riders to the team time trial is that the hardest part of the race is catching the train after doing a pull.  This implies that they were just pulling too hard, perhaps going well into anaerobic.

Easily the most important rule for team time trials is: DO NOT SURGE under any circumstances when taking the lead. When the front rider has finished their turn, the rider behind checks the speed on their computer and maintains that 
speed (assuming of course the road conditions remain constant).

The rider who has finished their pull moves to the windward side and decreases their speed slightly, allowing the other riders to pass. At least one member of the team will be riding near their anaerobic threshold, so if the lead rider accelerates they will be pushed so hard they may not finish. If no one is near their maximum, the team is not riding fast enough.

Stay Close!
The closer you are to the rider in front the less work you have to do. It is important to keep it tight. Don’t forget that if you are at the front you may have to gingerly pick a track around stealthy holes and obstacles. Better to do this than to point them out by taking the hands off the bars, which is rarely a good idea in an aero tuck on a TT bike. Consider calling out the really bad obstacles.


Stick Together!
We can all go out and do Lactate Threshold sessions by ourselves, and we now that some of us are fitter than others on any particular day, but it is important in the TTT to work as a TEAM.  It is important to keep the egos in check just for a few hours and work together. Some of the responsibilities the riders all have in this are: 
  1. If you are taking a pull at the front and feel strong, go ahead and  take a longer pull (say 1-2 minutes instead of the normal 30 secs); if you feel like accelerating, make sure you take a peek behind you to ensure that the train is still together, otherwise slow down;
  2. If you feel like dying and that the train is going too fast, take shorter pulls, (like 10-20 secs) and say "slow down" quietly as you drop to the back, communicate to the rest of guys that you are suffering, but DON'T just out of the blue, drop out altogether; 
  3. If you are the last guy in the train, try and help the next guy dropping in behind you.  If you feel strong, consider dropping back a tiny bit and pull the guy up (but be careful not to risk getting dropped yourself!).  If you see that the guy is suffering, communicate it up the train.
After you have taken a turn at the front, the correct protocol is:
  1. Look over your right shoulder and take a peek behind you to make sure there are no trucks/cars/other teams coming.  This is the cue to everyone behind you that you are going to drop off.  There is no need to (like some other teams do) wave your arm frantically or yell out to the guy behind you to move up.  A good team will be in tune enough to anticipate when the guy in front will drop off.
  2. Gently drift to the right (or left if the wind is strong enough from the right that the echelon is going anti-clockwise)
  3. Do not abruptly turn right when done your turn.  If you do this, and if the guy behind you's wheel is overlapping a bit, you will manage to make the entire train crash spectacularly! 
About the time at the front:
Assuming a train of 5 or more riders, the following pull times seem to work well:
- 15-30secs for uphill or into a headwind,
- 30-40secs on the flat
- 40-60secs downhill when the speed is up.
And of course, if you are dying, TAKE SHORTER PULLS! Your teammates will appreciate that much more than seeing you drop out.

About pacing strategy:
It is easy to go off fast.  The heart is pumping, the adrenaline is rushing through your system, and you are keen to get going.  However, numerous studies have shown that going off too fast usually leads to slower TT times. In fact, nearly every single running world record that has ever been set had pacing that was equal or negatively split (that is, the pace in the first half was equal to or slower than in the second half).  It is probably safe to say that this would apply to most endurance events (and the hour record splits bear this out).  Triathlon coach Joe Friel has called "Poor Ability to Pace" the number one mistake of athletes.

So what works? A "J" shape for the pace is usually ideal.  To an extent, accept that the adrenaline will keep things going at a good clip initially.  Settle in to a slower more comfortable and realistic pace, and finish off with a bang, keeping in mind that a negative split is important, as is keeping the pace of the group aerobic right until nearly the end. A good way to monitor this is with a power meter. A heart rate monitor can also be used, in conjunction with bike speed, knowing that heart rate will drift up naturally in a long event, even if perceived exertion does not.

What about hills or strong winds?
Should the pace pick up, stay the same, or slow down?  I've often wondered about this and how it would affect the outcome of a race. I finally found a solution based on scientific approach based on minimizing exposure to the hill or wind, in order to minimize the energy cost.  These guidelines are the result (based on a single rider):
  • Coast at >50km/h
  • Pedal Easy at >40km/h
  • Pedal Steady at >30km/h
  • Pedal Mod-Hard at >20km/h
  • Pedal Hard at >10km/h
So, for the faster speeds of a TTT, perhaps a 10kph adjustment might be justifiable?  Thus, if the team was on a downhill and it's speed was greater than 60kph, it would be better to just coast.  However, if the hill was so steep that the speed up the hill was below 20kph, it would make sense to go hard.

Some other useful pacing tips (from individual time trialing) can be found here and here.

About the Race Plan:
Since this is a team effort, it is important to have all the riders on the same page at all times.  One way to help achieve this is with a race plan.  Some of the things that need to be discussed before the race starts are:
  • Starting order
  • Timing – what time targets are you aiming for that negative split?
  • Speed - what speed is required to achieve planned splits?
  • Mechanical issues -what to do if someone has a flat or a mechanical problem 
  • Nutrition
  • Team members getting dropped

About the gear
:
Lots has been written about the cost effectiveness of TT bikes, aero accessories, bike fittings, and other aids (see here and here).   That said, it doesn't always make sense to rush out and buy aero bars.  Most people I see with tri bars on a road bike have made their bikes heavier, and made themselves slower and less powerful. This has finally been pointed out in the mainstream cycling press and will be the subject of a detailed post to come.  That said, an aero helmet is usually a worthwhile purchase. However, the best return on investment, by far, is TRAINING, and preferably focused, TT specific training at lactate threshold or just below, in the sweet spot.

Happy training!